Tile Grout FAQ: Your Questions Answered
There are tons of options for tile grout, from color to consistency. If you’re looking for answers to help you in your shopping, you’re in the right place.
It can be confusing when trying to choose the perfect product. Why color grout should you pick? Which is better, sanded or unsanded grout? Luckily for you, this FAQ will answer all of the most common questions about grout.
Get ready to learn about the different kinds of grout, how to choose the right color, how to clean and maintain it, and much more.
What is Grout? Learn the Basics
Grout is used to fill the gaps between tiles, also known as tile joints. By filling these joints it creates a stronger bond between the tiles while preventing damage to the corners and edges.
Typically, grout is made from a base of polymer-enhanced Portland cement. Depending on the type, it may contain sand, or it could be sand-free. To enhance moisture and stain resistance, you can include a latex additive or sealer in your mixture if it isn’t included already.
Typically, grout is made from a base of polymer-enhanced Portland cement. Depending on the type, it may contain sand, or it could be sand-free. To enhance moisture and stain resistance, you can include a latex additive or sealer in your mixture if it isn’t included already.
What is the difference between grout and mortar?
People tend to get grout and mortar confused, however, they serve different purposes when installing tile. Mortar is the adhesive applied to the subfloor or other installation surface. Grout, on the other hand, is used to fill the spaces between tiles once installed.Grout and mortar have different compositions to help them fulfill these purposes. Most grout is made from a kind of Portland cement, while mortar, a.k.a. thinset is made from sand, water, and cement, and can also contain additives for increased bonding, water resistance, and flexibility.
What are the types of grout?
Not all tiles are the same, so of course, not all grout is the same either. There are a few varieties, and the best fit for you depends on the size of your tile, and where you’re installing it.Sanded Grout: Sanded grout contains…you guessed it – sand! It’s recommended for large tile joints, ranging from 1/8” to 1/2” wide. The grittier texture fills in these large gaps and prevents shrinking and structural issues. Sanded grout is best for floor tiles since the added sand provides more durability.
Non-Sanded Grout: This option is used in smaller joints no larger than 1/8” wide. unsanded grout works great for walls, countertops, and bathtub enclosures because it clings well to surfaces. However, it doesn’t hold up to heavy floor traffic.
Polymer-Modified or Standard Grouts: The most basic, standard grout is made from a polymer-enhanced Portland cement, with both sanded or unsanded options. You can mix in polymer additives for improved stain resistance, bonding, and flexibility.
Epoxy Grout: This unique grout is made from resins and filler that resists moisture and staining. Epoxy acts as a sealant so it is waterproof throughout. This option is stain-resistant and chemical-resistant and creates a strong bond. However, installation takes time and effort.
Pre-Mixed and Stain-Resistant Powder Grouts: Most manufacturers are now producing user-friendly grout that requires no mixing, dries quickly, and doesn’t require any sealing. These specialized grouts are basically every DIYer’s best friend. You can also purchase stain-resistant grout that doesn’t require the chemical component of epoxy.
How much grout do I need?
To calculate how much grout you need, measure your space, the size of your tiles, and the thickness of the tile joints.For example, a 100 square foot area covered by 12” x 12” tiles and .25” x .25” tile joints will need a little over 9 lbs of grout powder for sufficient coverage, on average (source). It’s always a good idea to purchase a little bit more grout than you think you need, just in case.
How do you choose grout color?
To choose the best grout color, think about how you will use the space. High-traffic areas are better with dark grout that won’t show as much dirt and grime. For something like a bathroom wall, a light gray or even white grout can make your space feel larger, which is always a plus. For more realistic wood-look tile, opt for a neutral brown grout that’s slightly lighter than your tile.Does grout color need to match the tile?
Grout and tile colors don’t always need to match, and you might have trouble getting an exact match anyway. Water and sealants can dilute and change the powder pigment. For an even color throughout, and less chance of dilution, consider an epoxy grout.Instead, try to coordinate colors instead of matching them exactly. Try to select similar tones that will look great together. You can use a grout color chart or color wheel to help you with this process. Sometimes, comparing colors side by side is the best way to find what you want.
Can you change grout color?
You can stain grout to change it to a darker color or even out any obvious color variations. Most grout stain products double as a sealant, so you get twice the benefits.How do you remove grout?
Removing grout isn’t recommended, as you could cause damage to the tile in the process. Instead, if you’re not happy with the appearance, it is better to clean the grout and change the color. Another option is to retile the floor for a fresh look.How to Grout Tile
- Prepare your space: Make sure the area is clean, and remove any dust or debris from the tile joints. Cover nearby surfaces with masking tape to protect them.
- Mix the grout: No grout products are exactly the same, so follow the manufacturer’s instructions. Mix your powder and water in a large 5-gallon bucket. It’s best to do this manually instead of using a power drill and a paddle attachment since the power drill method can introduce too much air to the mixture. Try using a margin trowel or a paint stirrer stick instead.
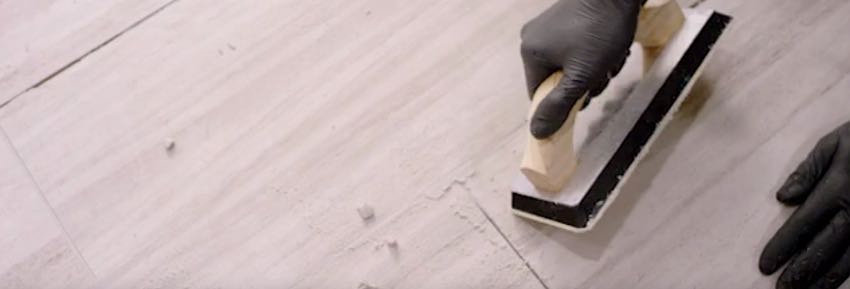
- Apply grout to tile joints: Scoop a workable amount onto a grout float. Press the grout into the joints between each tile, holding the float at a 45-degree angle to the tile surface. Use a sweeping motion to move diagonally across the joints.
- Clean off excess grout: Once all the joints are full, scrape away excess grout with the float. To remove any remaining grout, use a damp sponge.
- Smooth grout lines: Before the grout sets, use a damp sponge to gently smooth out any roughness. The goal is to have smooth, consistent lines throughout the room.
- Caulk: Caulk acts as a sealant and an expansion gap. You should apply caulk along backsplashes, floors, and walls, except for in showers and bathrooms, where grout is more appropriate. Apply the product where any vertical surfaces meet horizontal surfaces.
- Remove grout haze from tiles: After a while, you might see a thin layer or “haze” of grout on the surface of your tiles. Thoroughly wipe down the face of the tiles with a microfiber towel, until the haze is removed.
- Seal the grout: Once the grout is completely cured, apply grout sealer with a small paintbrush, or an applicator tool included with the sealer. If you also need to seal stone tile, there are some spray sealers that offer a lot of coverage.
How do you mix grout?
Mix grout powder and water in a large 5-gallon bucket using a margin trowel or a paint stirrer stick. As you mix, scrape the remaining dry powder down the sides of the bucket. Continue until all grout powder is dissolved and the mixture is smooth. Allow the grout to rest or ‘slake’ for 10 minutes.This lets the grout activate, and if it hasn’t properly rested before you use it, it’s more prone to weakness and cracking. Some quick-drying grouts do not need time to slake and you can apply them immediately. Always consult the manufacturer’s instructions.
Don’t mix all of your material at once, since it could dry before you can use it. Mix small batches at a time as you apply it and work in a small area.
How long does grout take to dry?
On average, it takes about a day for grout to dry and cure completely, but the time will vary depending on the type and the size of the area. Manufacturers are coming up with innovative new grout products that dry rapidly, so you can spend less time waiting and more time enjoying your new tile.How to Seal Grout
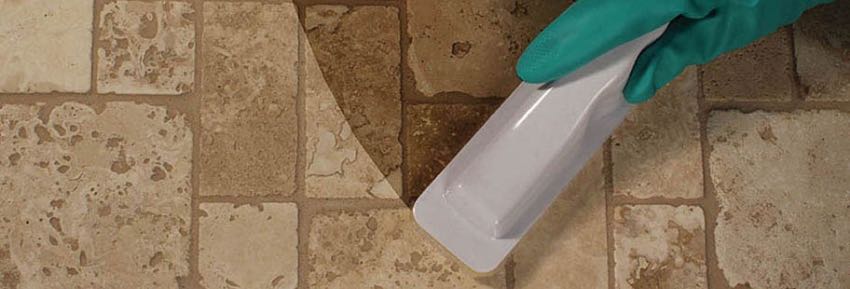
- Pick the right sealer: Consider the application area to determine if there will be a lot of traffic or moisture. If you expect the grout to face some challenges, it’s wise to choose a solvent-based sealer. The ideal sealer will also depend on the available application methods: paint, spray, or roll-on.
- Prepare the space: Cover any nearby baseboards, cabinets, or other important surfaces with masking tape. This will protect them from any extra sealant.
- Apply the sealer: Begin in a corner of the room opposite from the exit. Roll, paint, or spray along the grout lines, moving in one direction as you gradually cover the whole floor. Be methodical in your application to ensure thorough coverage.
- Let the seal dry: Wait for at least 15 minutes to give the first coat an opportunity to dry completely.
- Apply a second coat: You may need to add one-three layers. Always follow the manufacturer’s instructions to be sure. When needed, follow the same steps as the first layer to apply a second coat.
- Let the seal cure: Allow the seal to dry and cure completely before moving forward. This process can take up to 48 hours, and the time will vary from product to product.
- Test the seal: Sprinkle a few droplets of water over the surface. If the water absorbs, you need another coating of sealant. If it beads up and doesn’t soak in, you’re ready to use your floor!
Why should you seal grout?
Grout needs to be sealed to protect it from moisture. Without a seal, grout is porous and can absorb water, which leads to mold and mildew growth. On top of making grout easier to clean and more hygienic, adding a sealant boosts the durability and stain-resistance of your grout. You should seal all grout that doesn’t already contain a sealant in the mixture.When does grout need to be sealed?
You should seal grout immediately after it dries and cures. This will keep it looking new. However, sealing isn’t a one-time event. Reseal grout every few years or so, because the protective coating will wear down and become less effective over time.To test if you need to reseal your grout, sprinkle some water over it. If the water beads up, the seal is still working, but if it soaks into the surface, it’s time for a new seal.
How do you clean grout in stone tile?
Natural stone tiles are porous and can absorb caustic cleaners, which will stain the tile. Avoid any product containing bleach, vinegar, or lemon juice.Instead, use a mild solution of soap and water, and gently scrub the grout with a toothbrush. If all else fails, try a commercial stone cleaner. If it’s good enough for your stone tile, it’s good enough for your grout.
How often should you clean grout?
You should thoroughly clean grout every 2-3 months. If you want to avoid the buildup of spots or stains in the interim, do some spot cleaning on occasion. This will make deep-cleaning much easier, and you won’t have a ton of hard-to-handle stains.What is the best grout cleaner?
Best Homemade Grout Cleaners
- Dish soap: Combine hot water and dish soap to create a mild cleaning solution.
- Lemon juice: A mix of lemon juice and baking soda can tackle stubborn stains. However, you shouldn’t use it on porous tiles.
- Hydrogen peroxide: Use this product on its own and apply it with a spray bottle, or mix it with baking soda. Do not apply it to porous tiles.
- Vinegar solution: Dilute a small amount of vinegar in some water, and let the mixture sit on the grout surface for a few minutes before wiping away. Vinegar can stain porous tiles, so avoid using it for that kind of flooring.
Best Store-Bought Grout Cleaners
- Grout pen: Rather than fully removing tough grout stains, a grout pen covers up unsightly areas with a fresh color. However, it’s more of a cover-up than a real cleaning solution.
- Oxygen-based bleach powder: Oxygen bleach powder can tackle stubborn stains. Follow the manufacturer’s instructions to create a solution and use rubber gloves in a well-ventilated area. Oxygen bleach can damage tile surfaces, so test it in an isolated area first, and don’t use it on porous tiles.
- Steam clean: Carefully apply steam to the grout lines. The heat and moisture might loosen up ground-in dirt.
Conclusion
Now you know all there is to know about grout, from the different types to the best tips and tricks for maintenance. Are you ready to pick the perfect grout for your project? Start browsing our selection!


