Are you a weekend warrior looking for a DIY flooring project? Installing vinyl flooring can be a great DIY project, saving you money and giving you the satisfaction of having installed your own flooring. Not sure where to start? We can help!
If you’re a pretty handy person around the house, chances are you already have the tools and skills needed to install your vinyl flooring. You can easily install some vinyl flooring, even if you're a complete novice!
There are three main vinyl flooring types: tongue and groove planks and tiles, peel & stick, and sheet vinyl.
In this guide, we teach you how to install all three types of vinyl flooring.
| Related Content >> Easy DIY Flooring Solutions |
What You’ll Need:
- Flooring of choice
- Measuring tape
- Sharp utility knife
- Rubber mallet
- Marker
- Spacers
- Tapping block
- Chalk
- T-Square
- Level
- Tile cutter- optional
- Jigsaw- optional
- Finishing molding- optional
- Brad nailer- optional
Installation Floor Prep:
For all types of vinyl flooring installations, you should first make sure that your subfloor is both level and clean. This may involve using self-leveler, sanding, or using an underlayment.
Some vinyl planks, such as waterproof vinyl and rigid core, are thick enough to conceal imperfections in subfloors. However, it’s good practice to level your subfloor before to ensure that no transposing occurs; especially when using thinner vinyl.
Acclimate vinyl flooring to the room by allowing it to sit out and unwrapped for at least 24 hours before installation.
Leveling
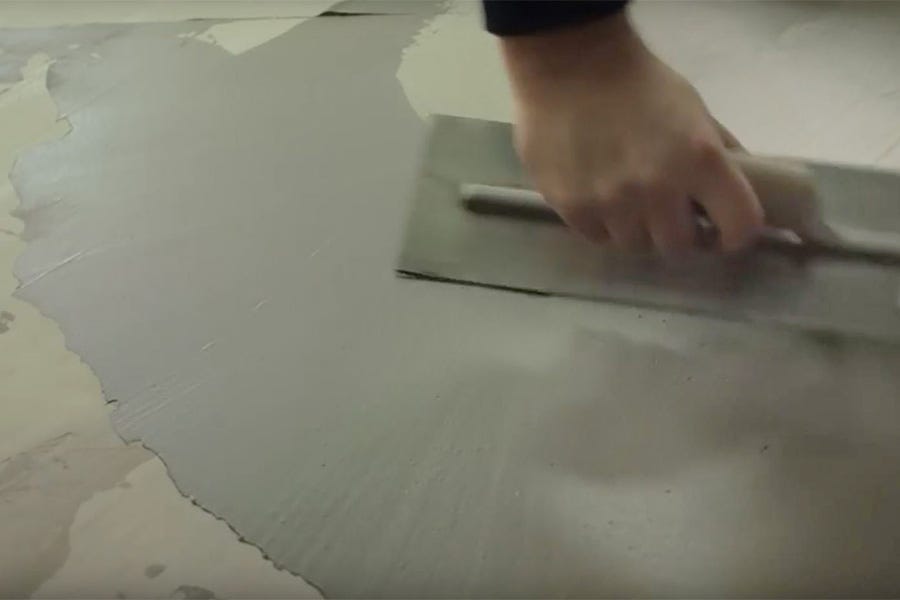
If installing over a concrete subfloor, you’ll want to sand or level any imperfections. That might mean filling in dips or scars with a self-leveling compound, patching concrete, or thinset mortar or sanding down bumps in the concrete. Use your level to check for subfloor imperfections.
Self-leveling compounds can typically be bought in any home store or online. It’s a quick drying concrete substance, so you’ll want to work fast when spreading and leveling.
If you’re installing over ceramic or porcelain tile, you’ll want to use a thinset mortar to fill in any imperfections or deep-set grout.
Check your leveling type for drying times. Typically levelers must dry for at least 24 hours before installing flooring over it.
| Related Content >> How to Install Vinyl Flooring on Stairs |
Undercuts and Baseboards
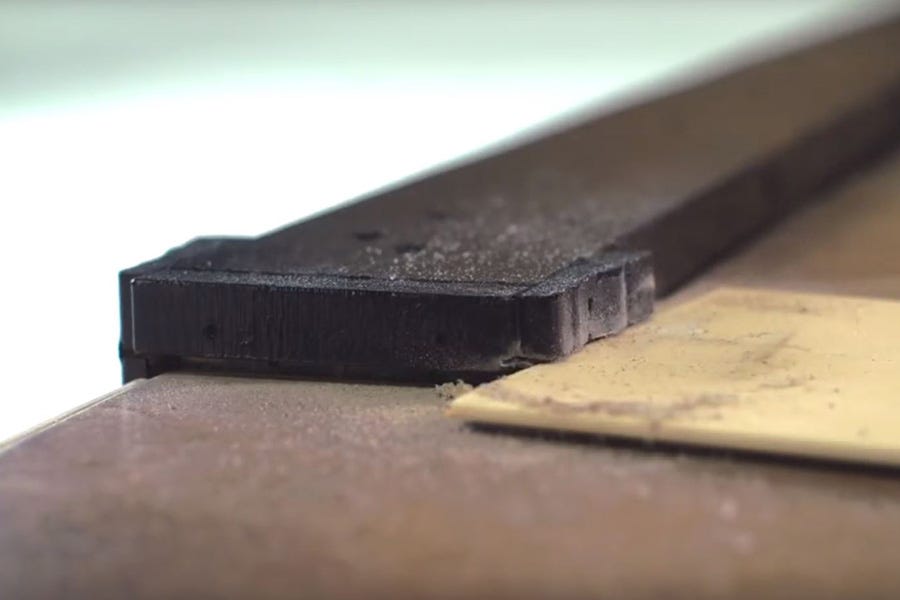
Before you begin installing, make sure to remove all your baseboards and set them aside. Also, measure the distance between the floor and any doors to make sure they clear when opening.
A good way to measure is using your vinyl flooring and marking where your door or doorjamb will need to be cut. You can cut doorjambs using a jigsaw or another fine tooth saw.
Cutting a door may require more specialized equipment, like a circular saw.
Cleaning
Dust and other particles can inhibit vinyl flooring from clicking together properly, or cause bonding problems when using tape or adhesive.
For this reason, you’ll want to make sure your subfloor is as clean as possible before installation. Be sure to vacuum and sweep up any particles and mop and degrease if needed.
As you install, you may find dust and dirt being kicked up. Keep a broom or vacuum handy to clean up as you go.
Measuring
What’s the saying? Measure twice cut once?
That definitely goes for installing flooring.
If you’re installing vinyl planks, you’ll want to plan the direction of your flooring and then measure the width of the room, dividing by the width of the plank (Room Width / Plank Width). This will tell you how many planks will fit across your room.
The last row of planks should never be cut down past half its original width. That might mean your first row of planks should be cut down slightly smaller to allow the last row to be slightly wider. Make sense? The same applies to vinyl tiles.
For vinyl sheets, you’ll want to plan at least a 3-inch overage on each edge of the sheet.
How to Install Vinyl Plank Flooring: Tongue and Groove
Your floors are prepped and your flooring is unboxed- what’s next?
If you’re installing luxury vinyl planks (or tiles) that use a tongue and groove locking mechanism, these instructions are for you.
Tongue and groove, also known as click lock vinyl is one of the simplest ways to install vinyl flooring. This type of installation requires no tape or adhesive and creates of floating floor.
| Related Content >> Vinyl Plank Flooring Buying Guide |
Plan Your Pattern
There are many different patterns you can follow when installing vinyl flooring.
Some people like to stagger their planks by making multiple cut lengths and arranging the first five rows from long to short.
We like to keep it simple and suggest staggering your planks by using whatever is cut from the end of the first row, as the start of your next row- as long as it’s at least 6 inches in length.
This pattern will create a more natural look to your vinyl flooring.
Additionally, it’s a good idea to mix up your vinyl flooring from separate boxes, to make sure any variations in color are staggered throughout your flooring, and not concentrated in one spot. This is especially important if you have a high variation vinyl plank.
How to Cut Vinyl Plank Flooring
There are several different ways to cut vinyl planks, depending on your experience level, tools, and the thickness of the plank. Be sure to check the manufacturer instructions for more specific methods!
Score and Snap
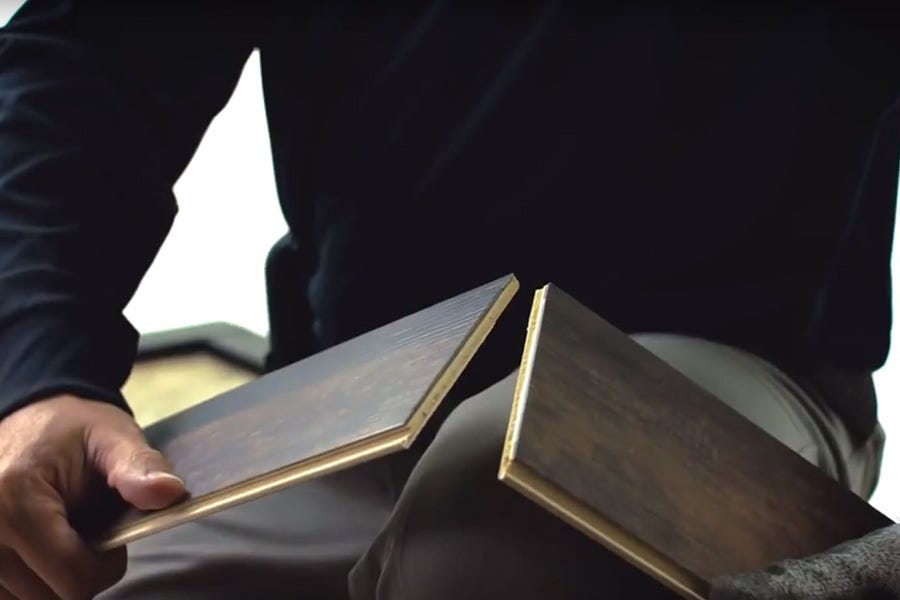
The simplest way to cut a vinyl plank is by scoring and snapping. Using your t-square to score a straight line, lightly score the vinyl plank on the surface side using a utility knife. You’ll need to make several passes.
Then bend along the score line to snap the plank in half. Some people use their knee as a leverage point to easily snap the plank.
Tile Cutter
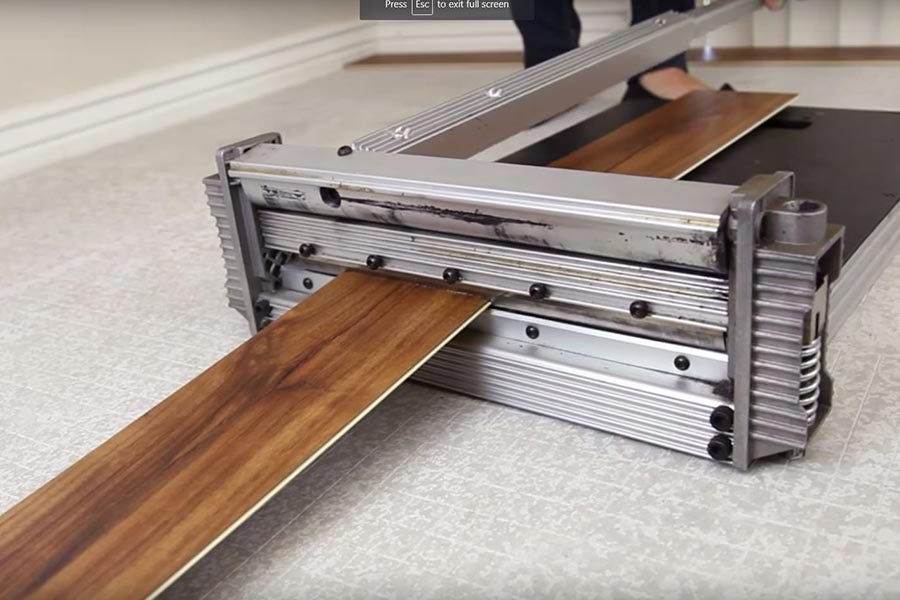
Another way to cut vinyl planks or tiles is by using a tile cutter. This can be purchased or rented from a hardware store for a one-time use.
You’ll want to measure and mark the spot where the cut will be made. At this point, it’s as simple as pulling a lever to make the cut.
Circular Saw
If you have the tool available and are proficient with its use, a circular saw can make a great cutting tool. You’ll want to use a fine-tooth blade and work slowly, as to not melt the vinyl plank.
Installation Steps

- Set the first plank in the corner of the room, working from left to right. Use your spacers to ensure there is a ⅜” expansion gap from the wall.
- Complete the first row by interlocking the tongue and groove connectors and aligning the seams.
- Continue laying the flooring, using the tapping block and rubber mallet to tap the planks into a locked position.
- When you come up to a wall and need to cut a plank, simply measure the space and mark on the plank where it is you need to cut. You can cut vinyl planks using one of the methods above.
- Use the leftover cut ends that are at least 6 inches or longer to begin your next row in order to stagger the planks and give them a more natural wood floor look.
- Set the plank into the previous row at a slight angle to ensure that it slides into place and interlocks correctly.
- Continue moving down the room ensuring that the planks are interlocked and all the seams have a tight fit. Add spacers every few feet around the edges of the flooring and remove them when installation is complete.
Finishing
When finished, you can reinstall the baseboards and, using a brad nailer, install your finishing molds to cover the expansion gap.
Reinstall any doors or appliances, and you’re done!
How to Install Peel & Stick Vinyl: Planks and Tiles

Peel & stick vinyl is known as the quick and easy home update. If you bought this, you’re probably not expecting to spend much time on the installation.
And you’re right! Though it does take some prep, peel & stick is a very easy installation method.
Plan Your Pattern
You should plan your peel & stick vinyl planks the same way you plan rigid vinyl planks: mix up several boxes of planks to make sure variations of color or thoroughly mixed in and use the end of the first row as the start of the next, and so on.
Peel & stick vinyl tiles will be a little bit different, depending on the pattern. If you’re creating a checkered pattern, we suggest chalk lining the room in order to find the center and installing from the center, outwards, by each quadrant.
Other peel & stick tile patterns may be slightly staggered or in straight rows. These patterns can be installed in a similar fashion as peel & stick planks.
How to Cut Peel & Stick Vinyl
Peel & stick vinyl options are easily cut using a sharp utility knife and snips if needed.
The simplest way to cut peel & stick vinyl is by using your t-square as a guide for a straight cut and making several passes with your utility knife.
For odd cuts, you may find snips are easier to use. Peel & stick vinyl is flexible enough to be cut without advanced hardware tools.
Installation Steps
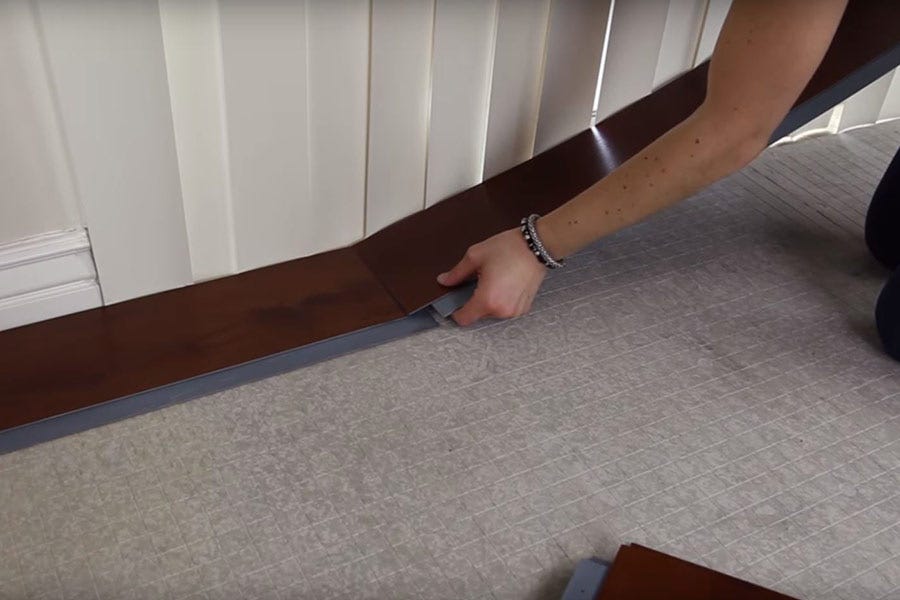
- Set the first plank or tile in the determined place in the room, depending on your pattern. Ensure your plank or tile is facing the correct direction by checking the arrows on the back of your vinyl product.
- Slowly peel back the paper to reveal the adhesive. Firmly place the tile or plank by pressing it down onto the surface.
- Complete the first row by exposing the adhesive and firmly placing the tile or plank onto the floor.
- When you come up to a wall and need to cut a plank or tile, simply measure the space and mark on the vinyl where it is you need to cut. You can cut peel & stick vinyl using one of the methods above.
- Continue following your pattern until the room is complete.
- To finish the installation, use a 100 lb. roller and roll over your flooring in several directions to ensure a tight bond to your subfloor.
Finishing
When finished, you can reinstall the baseboards and any new molding and doors.
Depending on manufacturer instructions, most peel & stick vinyl should be left 24 hours before moving any furniture back into the room.
SHOP PEEL & STICK VINYL FLOORING
How to Install Sheet Vinyl Flooring
There are two main types of installation methods for sheet vinyl flooring: modified loose lay and glue down.
Every space is different and one installation might work better than other installation types. For example, a loose lay installation is usually considered more temporary and more DIY friendly. Meanwhile, glue down installations, also known as fully adhered installations, are permanent and best left to a professional.
For both installations, we highly recommend using a pro. Precise cutting for vinyl sheets is vital and best left to a professional. However, if you feel like you’re ready to tackle the challenge, we’ll provide the instructions for both a modified loose lay installation and a glue down installation.
But first, here are some vinyl sheet installation tips to consider regardless of the installation method.
Plan Your Pattern
For sheet vinyl, planning your pattern involves deciding which direction to lay the sheet vinyl and where any seams might meet.
You’ll want to unroll the sheet vinyl in the room you’re installing in and let it sit for 24 hours to acclimate.
Once installed, do not add any permanent fixtures, such as cabinets, as this can lead to pinch points. This applies to all sheet vinyl, regardless of the installation method.
How to Cut Sheet Vinyl
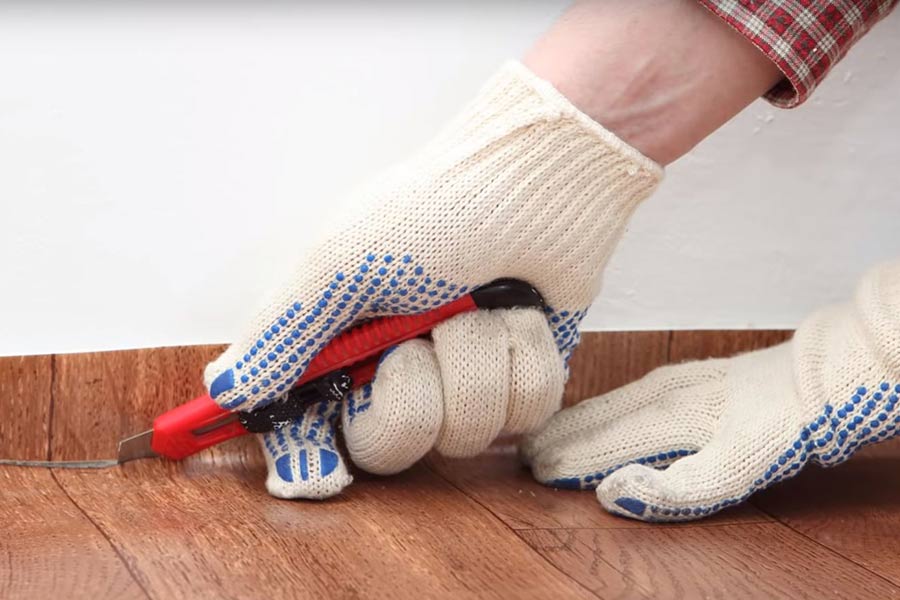
You can cut a vinyl sheet by using a sharp utility knife. You’ll need to cut the vinyl sheet to fit the edges of the room as well as around any objects. However, before making any cuts, ensure that the sheet is squared to the room. You don’t want a crooked or skewed pattern on your new sheet vinyl flooring!
| Related Content >> Sheet Vinyl Flooring Buying Guide |
How to Loose Lay Vinyl Sheets
Installation Steps:
- Unroll the vinyl sheet into the room you’re installing in. Line up any seams and make sure the sheet is properly square to the room.
- You’ll first want to use a sharp utility knife in order to make cuts around any objects in the room, such as toilets and sinks. Leave a gap of at least 1/8” - 1/4” so it lies flat without any bunching up or pinching.
- Next, cut the excess vinyl sheet around the perimeter of the room. Cut straight edges using a ruler as a guide. Again, leave a gap around the edges to ensure the sheet lies flat.
- Re-install any molding, trims, or doors as needed.
Note: There can only be one major seam with this method. If you have a larger space that requires multiple seams, you will need to use a fully adhered installation method.
Modified Loose Lay Method for Vinyl Sheets
The modified loose lay offers the same ease and temporariness but adds an extra bit of security and stability.
Additional Supplies:
- Silicone Sealant
- Double sided vinyl tape
- 100 lb floor roller
Installation Steps:
- Unroll the sheet and cut it to size, just as you would do with the typical loose lay method.
- Roll back the vinyl sheet from the edge and line the perimeter using double sided vinyl tape. Using a block or other flat object, press the vinyl tape against the subfloor to ensure a secure bond.
- Once the entire perimeter and any seams are lined with vinyl tape, peel off the backing of each section and unroll the sheet vinyl onto the tape. Press the vinyl sheet firmly onto the tape.
- Continue this process for the entire room.
- If you’re installing the sheet vinyl in a moisture prone area, fill in the edges with a silicone sealant to prevent moisture from getting under the vinyl sheet.
- Finish the job by rolling the perimeter with a 100 lb roller to ensure a secure bond to the subfloor and vinyl sheet.
- Re-install any molding, trims, or doors as necessary
How to Glue Down Vinyl Sheets
The glue down, or fully adhered, method is more permanent and stable than the loose lay method. When gluing down vinyl sheets, you have the option for a permanent bond, or a resealable bond. We’ll go over both options here.
Note: These are just general guidelines, and you should always follow the manufacturer’s instructions for the most accurate information.
Permanent Bond Method for Vinyl Sheets
Additional Supplies:
- Vinyl sheet adhesive
- Notched trowel
- 100 lb floor roller
Installation Steps:
- Ensure the subfloor is smooth, clean, and porous enough to bond with the adhesive. A wood subfloor will typically require an underlayment, while a concrete subfloor should be smoothed and leveled.
- Roll out the sheet and cut it to size, leaving a 1/8” - 1/4” gap between the edges of the sheet and any vertical surfaces. Also line up any seams at this time.
- Once the sheet is fit to the room, roll or fold it back to expose half the subfloor. Snap a chalk line at this point to indicate where to stop applying the adhesive.
- Evenly spread the adhesive using a notched trowel. Make sure it’s in a tacky-wet state.
- Immediately after applying the adhesive, install the vinyl sheet. Roll the sheet into the adhesive, rather than laying or dropping it over, as this could introduce air bubbles. Securely press the sheet into the adhesive using a 100 lb floor roller. Start in the middle of the sheet and work outward toward the edges to embed the flooring and remove trapped air.
- Once the first half of the sheet is fully adhered and rolled, fold back the second half of the sheet and repeat the process.
Resealable Bond Method for Vinyl Sheets
This option offers a secure installation with the opportunity to remove and reapply the sheet as needed. The difference between a permanent bond and a resealable bond is how dry the adhesive is before applying the sheet. A drier adhesive creates a gentler bond.
Additional Supplies:
- Adhesive
- Paint roller
- Soft-bristled push broom
- Hand seam roller
Installation Steps:
- Once again, make sure the subfloor is fully prepped and ready for installation.
- After the sheet has been rolled out and cut to size, and all seams are aligned, fold back one half to expose the subfloor. Snap a chalk line to indicate the stopping point for the first application of adhesive.
- Evenly apply the vinyl sheet adhesive using a paint roller, and allow it to dry until it’s in a dry-tacky state.
- Once the adhesive is ready, gently roll the sheet over the subfloor. Do not drop or lay it over, as this can create air bubbles under the sheet.
- Press the sheet into the adhesive using a soft-bristled push broom. Start in the middle of the sheet and work outward. For areas that cannot be reached by the push broom, embed the sheet using a hand seam roller.
- Repeat this process with the second half of the vinyl sheet.
Finishing
Re-install any molding, trims, or doors as needed. Remember, you cannot secure any permanent furnishings, like cabinets, over sheet vinyl.
Vinyl Flooring Installation FAQs
Does my flooring need an underlayment?
Some products have an underlayment attached, so you will not need to purchase additional underlayment with those products. At most, a vapor barrier will be needed in those installations.
If there is no attached underlayment, usually one is purchased. Underlayment has sound dampening properties, protects your subfloor and flooring, and makes your vinyl flooring softer underfoot. Cork is a popular choice for vinyl flooring, as rubber will cause staining.
Do I need to remove the baseboards?
To get a clean look, baseboards should be removed when installing vinyl.
For some vinyl products, such as peel & stick and sheet vinyl, baseboards may not need to be removed. For these products, a silicon sealant or quarter-round molding can be used to create a finished look.
What is a floating floor?
A floating floor is a floor that isn’t adhered to the subfloor using tape or glue. This type of floor is typically held in place by the weight of the connected floor.
Can I see my floor before I buy?
Yes, you can! Not only do we offer free samples, but we also have a cool website feature that allows you to upload a picture of your room and see what it looks like with our vinyl floors installed. It’s pretty cool!
Ready to shop?


