
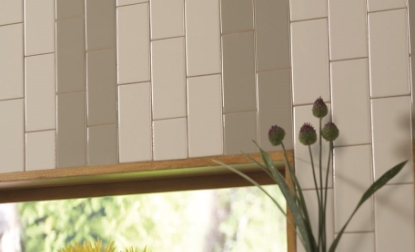
WHAT IS GROUT? TILE GROUT AND THINSET BUYING GUIDE
Choosing the right products for your tile installation project can be tricky, since there are so many options. The wrong tile grout or thinset could be the difference between a home improvement success and a less-than-perfect project.
So how do you decide on the right grout or thinset mortar? It starts with having all the information, and that’s where this guide comes in!
In this buying guide, you’ll learn everything you need to know about tile installation materials. Get ready to be an expert on the difference between grout and thinset mortar, the different types of grout and thinset, and how to choose a grout color.
Tile Grout vs. Thinset Mortar: What’s the Difference?
Both grout and mortar are essential materials for tile installation, but they serve different purposes. People tend to get them confused, or even think that they’re the same thing.
Thinset mortar is used to adhere tiles to a surface, while grout is designed to fill the spaces between tiles once they’ve been installed. Because they fulfill different purposes, these materials have different compositions.
Thinset mortar is used to adhere tiles to a surface, while grout is designed to fill the spaces between tiles once they’ve been installed. Because they fulfill different purposes, these materials have different compositions.
What is Thinset Mortar?
Thinset is an adhesive cement used to secure floor and wall tiles to concrete surfaces. The word “thinset” is sometimes used interchangeably with “mortar,” because it’s a type of modified mortar made specifically for tile.Thinset is made of sand, water, and cement, and can also contain additives for increased bonding, water resistance, and flexibility. Manufacturers have created specialized thinsets for different applications and varying styles of tile.
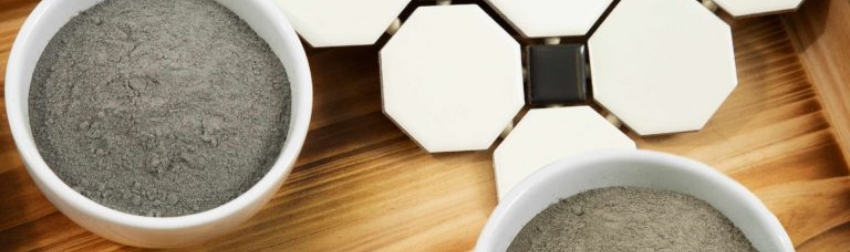
What is Grout?
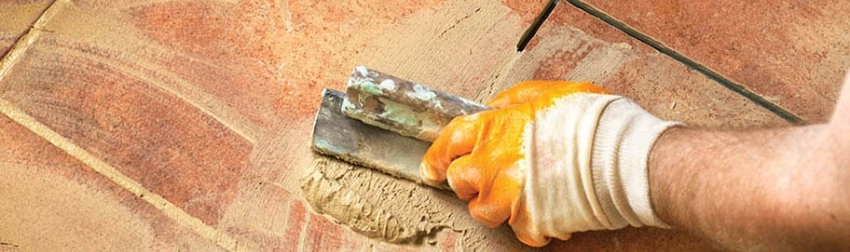
Grout is used as the filler between tiles in virtually every tile installation project. As it fills the gaps between tiles, also knowns as joints, it provides additional bonding, and prevents chips and cracks to the edges of the tiles.Standard grout is made from a base of polymer-enhanced Portland cement, and may or may not contain sand, depending on the type. You can include a latex additive or sealer in your mixture to enhance moisture and stain resistance.
Types of Mortar
Manufacturers have developed a lot of specialized mortars to maximize performance in different applications. To get the most out of your installation, you’ll need to find a thinset that was made just for you.
Modified Thinset Mortar
Modified thinset comes with some bonus benefits you won’t find with standard mortar. Additional products, like latex polymers, mix into dry thinset powder to increase the performance and bond strength. That means your tiles will adhere better to the subfloor, and the thinset will have a lower potential for absorbing moisture than un-modified thinset.Un-modified Thinset Mortar
Simply enough, un-modified thinset is a tile mortar that doesn’t contain any additives in the dry powder mix. People choose to use this type when they’re working with a moisture barrier over the subfloor, such as a schluter system.If you still want all the cool bonuses of a modified mortar, you can use liquid additives in place of water when mixing the thinset. These liquid polymers can boost flexibility, water resistance, and bond strength.
Large Format Tile Mortars
This type of thinset is also known as a medium bed mortar, and it’s made from a mix of water, cement, and coarse sand. Medium bed mortar is applied in a thicker layer than other types of mortar, typically at least 1/2” thick. The thickness increases drying time and creates a buffer between the tile and subfloor.These qualities make medium bed mortar perfect for large format tiles, which have at least a single edge that’s 15” or longer. A slower drying time reduces the risk of shrinkage as the mortar cures, so larger tiles achieve a stronger bond without any “lippage,” or an uneven surface. The thicker separation between the subfloor and the tiles can also keep your large format tiles from cracking if the subfloor shifts over time.

Glass Tile Mortar
Since glass is transparent and nonporous, glass tiles require a special thinset adhesive. White, latex-additive thinset mortar is the prime choice for backsplashes and other glass tile applications. The color of the thinset will be visible behind the glass, so a white adhesive works as a neutral backdrop.Fast-Drying Thinset
If you wanna go fast and pick up the pace of your installation, a fast-drying mortar is the choice for you. Designed with a faster cure rate, rapid-drying thinset mortar lets you get to the grouting stage faster than other products. With fast-drying thinset, you can get your tile down, get a head start on grouting, and get on with you life.No Slump Mortar
Also known as non-sag mortar, this tile adhesive is designed to have a strong hold. Use no slump mortar when you’re installing tile on a wall and you want to reduce the risk of slipping and sagging. You can also use no slump mortar as a medium bed thinset for large format tiles.Epoxy Mortar
Looking for a thinset that will hold up in a tough environment like a commercial kitchen, a warehouse, or a garage? Epoxy mortar is your guy. It offers a stronger chemical resistance than other types, so it’s a great choice for areas that might have a lot of fumes or chemicals. You can also use it to adhere tiles with resin backing, since typical mortars won’t bond with this material.Mastic
Mastic is a type of ceramic tile adhesive, and it has a different texture from all other thinsets. It’s tackier and even a little bit gluey. This stickier texture is perfect for tiling a wall, since there’s less of a chance for sliding.It’s not all gluey goodness, however. Mastic has a couple of limitations you should know about. First, it’s not a great option for larger tiles. Try to stick to tiles no larger than 12” x 12” wide. Second, mastic doesn’t perform well in high-moisture areas. Avoid using mastic in places with lots of exposure to water, like showers and bathrooms.
Types of Grout
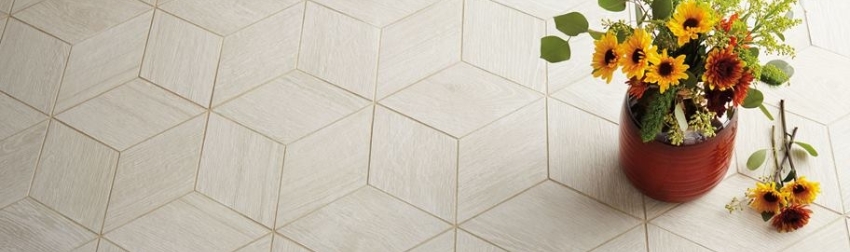
There are a few main categories of grout, and the best fit for you depends on a few factors, including the size of your tile, and where you’re completing your installation. Discover the traits of each type to help make your decision.
Sanded Grout
Sanded grout contains…you guessed it – sand! This type is recommended for large tile joints, ranging from 1/8” to 1/2” wide. The grittier texture fills in these large gaps and prevents shrinking, so it keeps your floor looking lovely while preventing structural issues. This is also typically the best option to fill in spaces between floor tiles, since the added sand provides more durability.Non-Sanded Grout
There won’t be any sand in this option, because it’s used in smaller joints no larger than 1/8” wide. Use unsanded grout for walls, countertops, and bathtub enclosures. Unsanded grout is a great option for wall tile installation because it clings well to surfaces, but it doesn’t hold up to heavy floor traffic.Polymer-Modified or Standard Grouts
Standard grouts are made from a polymer-enhanced Portland cement grout. This grout can be sanded or unsanded, and can be mixed with polymer additives for stain resistance, strong bonding, and flexibility. For an easy clean-up experience and an affordable price tag, standard or polyblend is the way to go.Epoxy Grout
Epoxy grout is a mix of resins and filler that resists moisture and staining. Since epoxy acts as a sealing agent, it’s virtually waterproof throughout. Hurray, no need for sealing! Epoxy grout also provides maximum stain and chemical resistance, and it creates a super strong bond between tiles. All those big benefits do come with a slight drawback that you should keep in mind: installation is labor- and time-intensive.Adhering epoxy grout is a two-step process. First, you need to fill all the tile joints with epoxy. Then, you need to go over all those gaps again to add the colorant/filler. Once the fill is completed, you’ll need to use an acid wash on the tiles to remove any resin remaining on the surface.
Pre-Mix and Stain Resistant Powder Grouts
Short on time and patience? Cut a step out of the tile grouting process by purchasing a pre-mixed grout. Most manufacturers are now producing user-friendly options that require no mixing, dry quickly, and don’t require any sealing. These specialized grouts are basically every DIYer’s best friend.You can also purchase stain-resistant grout that doesn’t require the chemical component of epoxy. Stain-resistant grout still needs to be mixed, but that could be worth the time if you’re installing tile in a high-traffic area that’s prone to dirt.
How to Choose a Grout Color
Grout comes in a variety of color options, and it can be overwhelming to coordinate the color with your tile. Fear not! There are a few helpful tips to keep in mind as you make your decision.
Choose the Right Grout for Your Room
First, you should think about your space. Are you installing tile in a high-traffic area? If that’s the case, dark grout might be a good choice for you. Darker colors don’t show as much dirt and grime, so they keep looking great for longer.Or maybe you’re tiling your bathroom wall, and you want the room to look really bright and open. This is a great opportunity to use light gray or even white grout. Lighter colors can make a space feel larger, which is always a plus.
Do you have wood-look tile in the kitchen or living room, and you want it to look as realistic as possible? This is when you should opt for a neutral brown grout that’s slightly lighter than your tile.
Whatever your needs may be, there’s a grout color to get you the look you want.

Does Grout Need to Match the Tile?
Grout and tile colors don’t always need to match, and it can be hard to get an exact match anyway. Water and sealants can dilute and change the powder pigment. For an even color throughout, and less chance of dilution, consider an epoxy grout.Still, a better strategy might be to coordinate colors instead of matching them exactly. Try to select similar tones that will look great together. You can use a grout color chart or color wheel to help you with this process. Sometimes, comparing colors side by side is the best way to find what you want.
Should Tile be Darker or Lighter than Grout?
It’s possible that the last thing you want is an exact color match. One of the biggest trends on Pinterest right now is a high contrast between tile and grout. Dark tiles stand out with white and light gray grout. White tiles look even brighter when paired with dark gray or even black grout lines.If you have an intricate pattern or beautiful natural texture on your tile, the right grout can help you showcase these features. Here’s a good rule of thumb to follow: If your tile has a lot of color variation, match to the lightest or darkest color in the tile. This will create some visual coherence between the tile and grout. Plus, it will bring out those varied colors in your tile and create more depth as a result.
Can you stain grout to change the color?
If you have existing grout, but the color is uneven or it isn’t dark enough for you, a grout stain can help. You can stain grout to look darker and even out any obvious color variations, and most stain products also double as a seal, so you get twice the benefits. Pretty cool!Grout and Mortar FAQs
Still have some questions? That’s fine! Grout and mortar are complex subjects, and it’s a good idea to do lots of research before picking products. Arm yourself with even more information by reading up on these frequently asked questions.
Conclusion
By now, you know just about everything there is to know about grout. You understand the difference between grout and thinset, you know the many types of material available to you, and you can pick the best color for your tile. All you have to do next is put all this knowledge to use!