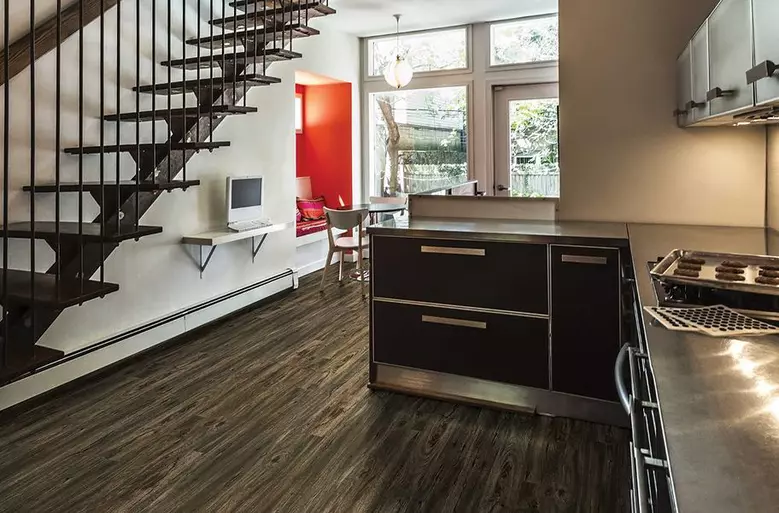
Please note: trim images are an example of shape and size. Images are not necessarily specific to this particular product. Moldings are not created to be an exact match, but as a complement to the overall color & finish of the floor. Grain and color variation should be expected.

New Standard 2 Rigid Core Vinyl Planks

Phthalate free & VOC free
Lifetime residential warranty & Lifetime Waterproof and Pet Warranty
Hatteras out of stock until 1/29/16
Will not interlock with floors ordered before 4/2018.
Luxury vinyl - real wood look.
Starting at only
$123.91 /SQ FT

New Standard 2 Rigid Core Vinyl Planks

loader
Loading...
  • Phthalate free & VOC free
  • Lifetime residential warranty & Lifetime Waterproof and Pet Warranty
  • Hatteras out of stock until 1/29/16
  • Will not interlock with floors ordered before 4/2018.
  • Luxury vinyl - real wood look.
View All

More Information

Achieving a beautiful wood look that requires little to no maintenance has never been easier than with The New Standard 2 vinyl flooring. These planks are completely waterproof, highly durable, and resistant to dents, making them ideal for any room of the home. A no-mess, glue-less installation, these luxury vinyl planks can be installed with minimal floor prep over existing hard surfaces and will help to hide subfloor imperfections. With a 25 year residential warranty, you are sure to love your new flooring for many years to come.

Details

Installation is simple and is commonly done by our customers. Installation of planks and tiles is as follows: Complete any necessary floor prep. Start with the tongue side facing the wall. After the initial starter board, press the end seam of the second plank into the end seam of the first plank, and then lock them together by laying the plank down. Continue working left to right. Install the first plank in the second row by inserting the tongue into the groove of the plank in the first row. This is best done with a low angle of the plank. Insert the long side seam at a slight angle first. As the top surfaces meet, rotate the plank down into the locked position. Engage the end seam, using a rubber mallet if necessary. Planks may be cut with the use of a crosscut power saw. Continue installing planks removing any gaps using a tapping block and a scrap of flooring to cover the tapping block. Be careful not to damage In*Step tongue and groove. Protect all exposed edges by installing wall molding and/or transition strips. Make sure that no plank will be secured in any way to the subfloor.
Maintenance of the floor typically includes: Daily or weekly vacuuming or dust mopping of dirt, grit, dust etc. Use felt pads under chair and furniture legs to prevent scratching of the flooring surface. Place door mats at all entrances to prevent tracked in dirt, rocks, moisture, and other debris. Avoid using rubber backed mats as they can stain the flooring surface over time. When mopping, use a damp and never a wet mop. Clean up spills immediately to prevent damage to the floor.

Reviews

Questions

Customer Questions And Answer
A reducer or end cap would be recommended for this space. Coordinating end caps in this series are not currently available. The transition piece typically installs directly into a track and onto your subfloor. Rubber flooring ramps are a suitable solution...
Groovy! These Planks are definitely a durable and quality flooring option. The interlocking design makes them perfect for any DIYer or Weekend Warrior, so you can be back on the road in no time.
Please review the detailed installation instructions PDF that is available above in our Installation Info tab. Be sure to account for ¼” expansion gap during installation.
Because houses and buildings, as well as adjacent hardwood or laminate floors, expand and contract, we recommend leaving a ¼” expansion gap between the perimeter walls and any adjacent flooring.
The flooring would be fine for a person with a walker.
loader
Loading...