How to Buy Sheet Vinyl Flooring
On a budget? Need a new floor for your apartment? Bored of the regular, standard flooring? Not in the mood to clean every day? Don’t worry. Vinyl sheets have got you covered!
A vinyl roll is a versatile, affordable flooring solution that goes in virtually any room, including bedrooms, bathrooms, and more. It’s made from highly resilient vinyl and a durable backing, such as fiberglass. They come in large, flexible sheets that provide continuous flooring coverage. You can now find sheet vinyl for sale for homes, businesses, and even commercial spaces.
Maybe you’re asking yourself why vinyl rolls would be a good fit for your floor, and honestly, there is so much to love. This affordable flooring solution is durable, easy to install, and requires minimal maintenance efforts.
Plus, there’s the comfort factor to think about. It’s softer than tile or wood, and it’s warmer, too. The means no more chilly floors in the mornings, and now more achy joints after walking around on a hard surface all day.
Many vinyl rolls come with bonus features. Want to know more? Keep reading!
Customer Favorite Vinyl Rolls
Looking for the best of the best? Compare our top products by price, thickness, warranty, and more. That way, you’ll be able to find the perfect match for you.
Features
Water-Resistant
Our water-resistant products hold up to moisture with ease. While not as buff as a totally waterproof options, water-resistant flooring is great for kitchens, living rooms, bedrooms, and more.
Asthma and Allergy-Friendly
Healthy breathing conditions are important for everyone, but if you have special concerns about VOCs or phthalates, consider an allergy-friendly vinyl sheet. These products are designed with asthma and allergies in mind, so you can breathe easy.
Pet-Friendly
Don’t forget about your four-legged family members when it comes to buying flooring. Vinyl sheets are the perfect solution for pets! Why? To start, sheet vinyl offer options for durable wear layers and water resistance. Pet messes and nail scratches won’t cause so much worry. Your pets will enjoy the benefits, too. Paws won’t slip and slide on those textured surfaces. Plus, the resiliency and comfort ensures your pet is always cosy and feeling at home.
Types of Sheet Vinyl
Before you start learning about the benefits of sheet vinyl, it’s important that you know about the different types you can choose from. Each type of sheet is designed for a certain use, and they have different levels of durability. Discover what makes each type unique, and how you should use them.
Fiberglass Construction
Vinyl floors with fiberglass cores and backing are unique in that the backing allows the floor to lay flat and it won’t curl up at the edges. This gives options as to how it can be installed: either loose laid or modified loose laid. This means that you can use a pressure-sensitive glue or double-sided carpet tape around the perimeter of the room. Vinyl sheets with fiberglass backing do not need to be fully glued to the floor, but you may like to if it is a heavily trafficked area.
Fiberglass Construction with Foam Backing
Some vinyl sheets have a fiberglass core but feature a different, more flexible backing like foam. This foam backing adds an extra level of comfort, so it won’t be hard on your joints if you plan to stand for a long time. With this combined construction, you get both the durability of a fiberglass sheet and the comfort of a foam sheet.
Felt Backed Vinyl
Felt backed vinyl flooring has a softer backing than its fiberglass counterpart. For this reason, it must be secured in place with adhesive for a permanent installation, or else it can tend to curl on the ends. Additionally, you’ll need to let it acclimate to your room for at least a day before you start installation. Since the backing is soft felt, which can absorb water, this type of sheet vinyl is not recommended for areas with the potential for moisture.
Sheet Vinyl Construction
Luxury vinyl sheet flooring is very strong, making it perfect for high traffic areas in the home. Vinyl’s multilayer construction offers superior durability and each layer has a different but important purpose:
Wear layer: This is the very top layer that you’ll actually feel on your feet. It specifically protects against scratching and staining, making a floor that is super easy to clean.
Texture/Definition layer: Here’s where you’ll find the colors and patterns that make the floor look so beautiful.
Core layer: This is the comfort layer that makes it feel like walking on clouds. Well, not necessarily clouds because you’ll likely still have a concrete subfloor underneath, but it will feel heavenly. The foam layer provides cushion, anti-fatigue properties, and warmth underfoot. Please note: not all vinyl sheets come with the foam layer, and it will vary from product to product.
Backing layer: This is the backbone of your flooring and provides a strong foundation. This helps to keep your floor strong and resistant to cracking or curling. Some backing layers available are fiberglass, felt, and foam.
Vinyl Roll Styles
These days, vinyl rolls come in a range of attractive styles, from wood-look and stone-look patterns to detailed decorative rolls. Manufacturing innovations have created the most realistic sheet vinyl flooring you’ve ever seen. In fact, some of it is so convincing, it will be sure to amaze you. Best of all, there are plenty of color and pattern options, so you won’t have any problems matching your style.
Patterns and Looks
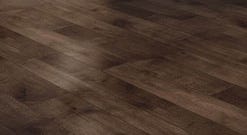
Wood-look vinyl sheets: For realistic wood-look vinyl, a sheet is an affordable option. Wood-look sheets have textured surfaces that go with the grain of the wood so it looks and feels like actual wood!
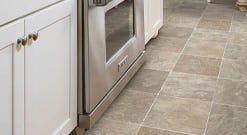
Ceramic-look vinyl sheets: Finally, you can get the trendy look of ceramic tile without contending with that hefty price tag! Ceramic-look vinyl offers popular tile patterns and textures, and some even have realistic looking grout lines.
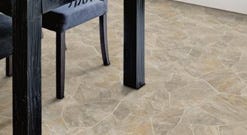
Stone-look vinyl sheets: Natural stone tile patterns and textures are now offered in premium detail. Some sheets now showcase grout lines that actually have a little bit of a depression, as if they were actually grouted on a tile floor.
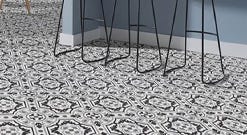
Decorative vinyl sheets: Sometimes natural looks just won’t cut it, and you need something a bit more creative. This is where decorative sheets excel, offering unique patterns and color combinations.
Wear Layers
10MIL: Wear layers this thick are going to be a great fit for any home. Even if your house is full of pets or prone to spills, this buffer will protect your floor from these challenges.
12MIL: Consider this a step up from quality residential wear layers. This option is good for both residential and light commercial use.
15MIL: This is a great option for the toughest floor. Sheets with a wear layer this thick are commercially rated to hold up to high traffic environments as well as RVs, trailers and mobile homes. But you can still use it in your home for some extra flooring protection.
20MIL: The buffest of the buff, this wear layer can handle whatever you throw at it. Sheets with this wear layer will shine in commercial spaces, RVs and even trailers, but it's also perfect for a busy home with lots of pets.
How to Install Sheet Vinyl
Vinyl sheets can be installed absolutely anywhere in the home, including below grade in basements. Vinyl flooring is versatile and commonly installed in kitchens, bathrooms, basements, laundry rooms, and more. You have a couple installation options, depending on which type of vinyl sheet you get.
Regardless of how it’s installed, a professional installer is recommended for the best results. Vinyl sheets are made to cover large areas, and most rolls come at around 12’ in width. This large size makes them difficult to handle and apply properly unless you have the right experience.
Adhesive Installation
If your vinyl sheets are intended for a business or some other high traffic area, you should always glue them down with adhesive. This is a more permanent option that ensures a sturdy, stable floor. Vinyl sheets glued down with a permanent adhesive can last for up to 20 years, so you know you can depend on them for years to come.
Consider these top-selling adhesive products for your installation:
Polyurethane Adhesive: This moisture-curing polyurethane adhesive works with a variety of applications, including wood flooring and rubber flooring.
SprayTac Adhesive: Utilizing 80% less adhesive, this easy to use spray adhesive is very easy to clean when wet and contains no VOCs. This odorless adhesive is resistant to high moisture and is pH resistant.
Loose Lay Installation
Also known as floating installation, the loose lay method requires no adhesive. Instead, the vinyl roll is cut to fit the room, and the weight of the sheet ensures that it lays flat. This method is recommended for smaller rooms where there won’t be a lot of traffic. One benefit of a loose lay sheet is that you can easily replace it if you want to update your look.
How to Clean Sheet Vinyl
Cleaning and maintaining sheet vinyl is very simple. Sweep or vacuum up loose dirt as needed. For a more thorough clean, mop or wipe the surface using a specialized cleaner. To prevent staining and discoloration, make sure to clean up spills quickly. With regular maintenance, your flooring will look beautiful for years and years to come.
Consider this top-selling vinyl cleaning product:
Rubber Floor Cleaner and Degreaser: This is a ready to use, fast-acting, low-odor, rubber floor cleaner and wax remover. You don’t need to dilute it with water, and you can use it to clean both virgin rubber flooring and recycled rubber flooring. Our cleaner is biodegradable, and it estimated to clean 3,000 square feet per gallon.


