

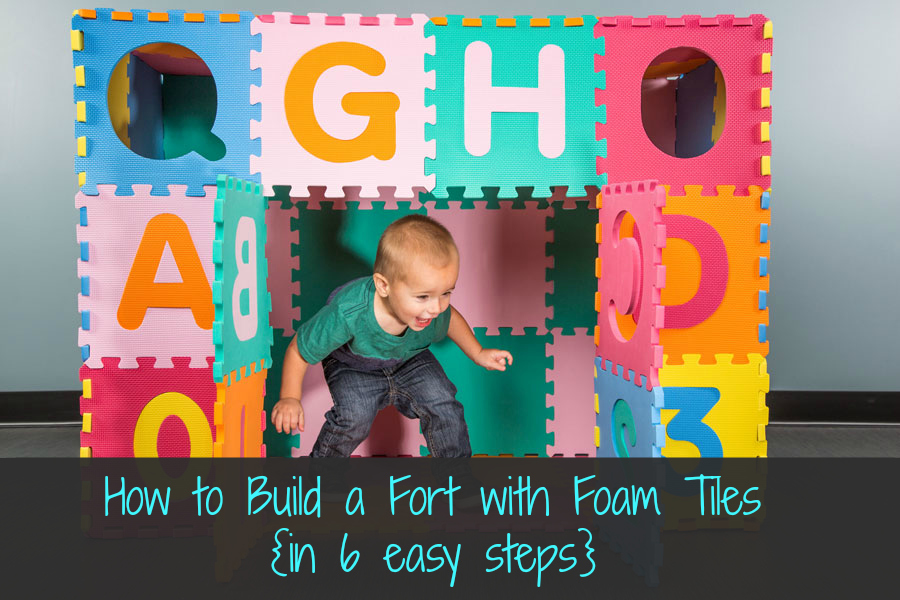
How to Build a Fort with Foam Tiles {in 6 easy steps}
How to Build a Fort with Foam Tiles {in 6 easy steps}
Get creative with your kiddos without any extra toys. Learn how to build a fort with foam tiles in these 6 easy steps.
Do you remember building a fort as a kid? My friends and I would move around all the furniture and use blankets and sheets to create our own secret hiding place.
It was so fun!
For me, anyway. I don’t know if my parents would call moving all the furniture back into place and then cleaning all the sheets before bedtime “fun”. In fact, I do recall being told no more forts at one point. I’m pretty sure it was the saddest day of my life.
Don’t worry! We’ve figured out a fun activity you can do with your little one to build them their dream fort without messing up any of your furniture.
I have a confession. The first time we practiced building the fort, we made an adult sized one. I ate my lunch in there that day. It was basically my favorite day of work ever. Maybe the best day I’ve had since my mom told me I couldn’t build any more forts, like 20 years ago.
This does take a little help from mom/dad/big sister/grandma/your neighbor, but it is a super fun project that your kid will absolutely love. And I swear, it’s super easy. The whole thing will be done in less than 15 minutes.
*Note: You can build a fort with many different types of soft foam tiles. In this post, we used our Medium Foam ABC-123 Mat. Make sure you are using all the same type of tiles or the fort will not connect correctly.
Choose Your Color Theme

Okay, so maybe this isn’t important to you, but a well-organized fort is a pretty fort! We were pretty big fan of the checkered theme, but there is so much you can do.
Give each wall a solid color or use a pattern. Of course, your options will change based on the color of your tiles so it’s nice to assess the situation a little bit beforehand if you’re concerned with your fort design.
Related post >> How to Make Costumes & Props from Foam Tiles
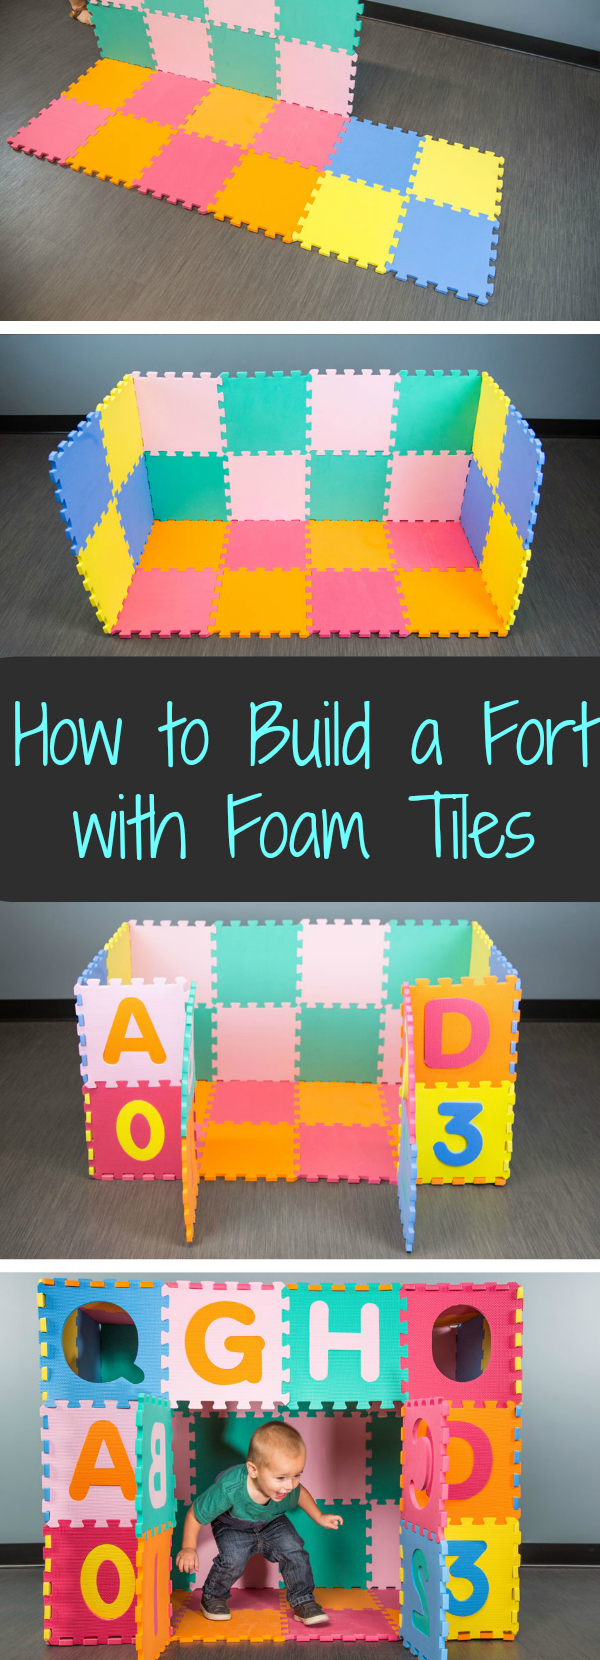
Make Your Floor
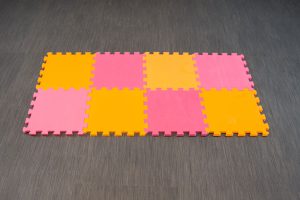
Okay! You’re ready to really begin. First, you need to decide the dimensions of your fort. We went with 4
We went with 4 tiles long by 2 tiles deep. These are very small tiles – if you use 4×2 in full-size tiles, it will be 4 times as big! This size would be just 2×1 in regular tiles. You don’t need nearly as many as you’d think.
We figured that out pretty quickly with an accidentally giant-sized fort. Whoops.
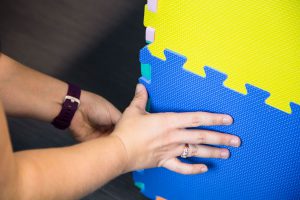
Once you’ve decided on the dimensions, interlock your tiles together. If they have two different sides, for example, ours typically have a smoother side and a textured side, make sure that all tiles have the same side facing up. Otherwise, they won’t lock together properly.
I recommend putting the brighter textured side facing down. I know that sounds counterintuitive, but this will make it so your walls (the part everyone sees!) have the prettier side out.
Again, that’s only if you care about looks. All that really matters is that they’re all the same.
Add the Walls


Okay, so your back wall is going to be the same size as your floor. That is, unless you want to make your fort taller. In that case, it will be the same length, but you can add as many tiles long-ways as you want, as long as you keep it consistent with all walls.
We ended up starting with our walls two tiles high but, as you’ll see later, we ended up adding an extra tile to give the little guy more space in there because he’s pretty tall. If you have a 3 or 4 year old, you can make it even higher!
Now that the sizing is settled, you’re ready to add some walls to your palace. I mean fort. Connect the tiles to form your back wall, then connect it directly to the floor in one flat level.
This next part might take an extra person – one on each side. Keep the floor pressed down but gently lift the wall. This is the easiest way to get your wall connected to the floor. We tried putting it in facing up. It was doable but more challenging.
Once you get the wall lifted and mostly in place, go down to where the pieces are connected and gently press them together a little more to make sure it’s sturdy.
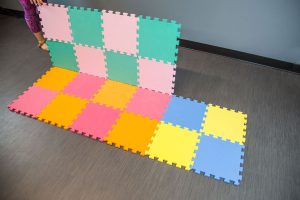

Repeat with each side. Now you will need to connect the walls to each other. Start from either the bottom or the top and gently press the edges together. They will fit fairly easily. If they aren’t fitting, go back and check that you have everything facing the same direction.
Remember, when you put everything together on the ground, you should have the same side of every tile facing up.

Once you have your walls in place, go through and gently reinforce the connection by pressing the pieces in just a bit more. This isn’t necessary, but I’m just saying…our fort stayed up for, like, a week until we were forced to take it down. I might have cried a little.
Related post >> How to Install Foam Tiles
Don’t Forget the Door


The actual door is optional, but you do want to make sure you leave an opening so you can enter. If you’re following our dimensions, connect 4 tiles to your floor on one side, not the middle. Lift them up and connect the corners.
Take the two closest to the middle and fold them back out to create an opening. Repeat on the other side.
The doors will be surprisingly functional! Our little guy was able to open and close the doors multiple times with all the care and gentleness a 1 1/2 year old usually brings. Of course, with too much use, they will start to come off, but they can easily be placed back on.
Related Content >> EVA Foam Safety
Now, Top it With a Ceiling
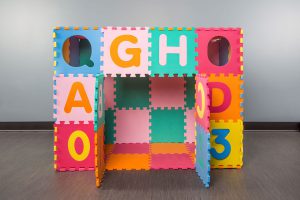

Or you can leave it open! The choice is up to you.
To make the ceiling, simply recreate the dimensions of your floor and gently press the tiles on top to connect them. You may want to reach around from underneath to support during this process so you don’t use your Hulk strength and press the whole thing to the ground.
Remember people, this is foam, not brick or even sticks.
Play Time!


This fort is toddler-friendly! This little guy walked in for his photo shoot and immediately ran into the fort, started opening and closing doors and just having a grand old time. He was not gentle with it by any means, but it held up really well.


It’s the perfect place to let your little one play and don’t be afraid to join in on the fun. Adults can fort too.
When you’re done playing, you can leave the fort up for playtime later, or take it apart and use the tiles as a soft floor mat. You can also easily stack and store them in their container if you’d like to get them out of the way.
In Conclusion
If you use a little imagination, the possibilities are endless. You can use a floor mat/teaching tool and turn it into a fort. You could even take it a step further and create a castle or tower. Just be careful not to let the kiddos stand on unsupported foam. Again, it’s foam.
Ready to get building with your kiddo? Here are the foam tiles we recommend for optimal fort building.

ABC-123 Mat
Eco-Soft + Tiles
Ari Ziskin is our resident expert in all things fitness, dance and flooring trends. After five years of blogging at Ari’s Menu, where she was featured on sites like The Huffington Post and Buzzfeed, Ari decided to pursue writing full-time. Nothing makes her happier than sharing her knowledge to help people create their gyms and begin their fitness journey.

